Procedural Traffics
I've always thought simulating traffic is far beyond my skill, but thought maybe it's not that complicated to imitate a minimal version of it.
Though it's not an accurate traffic sim, it appeared as interesting behavior mimicing traffic, driven by just two simple rules of condition. And I liked observing it for a while.
Followings are the basic steps to reproduce inside Houdini.
Prepare Curves for Input
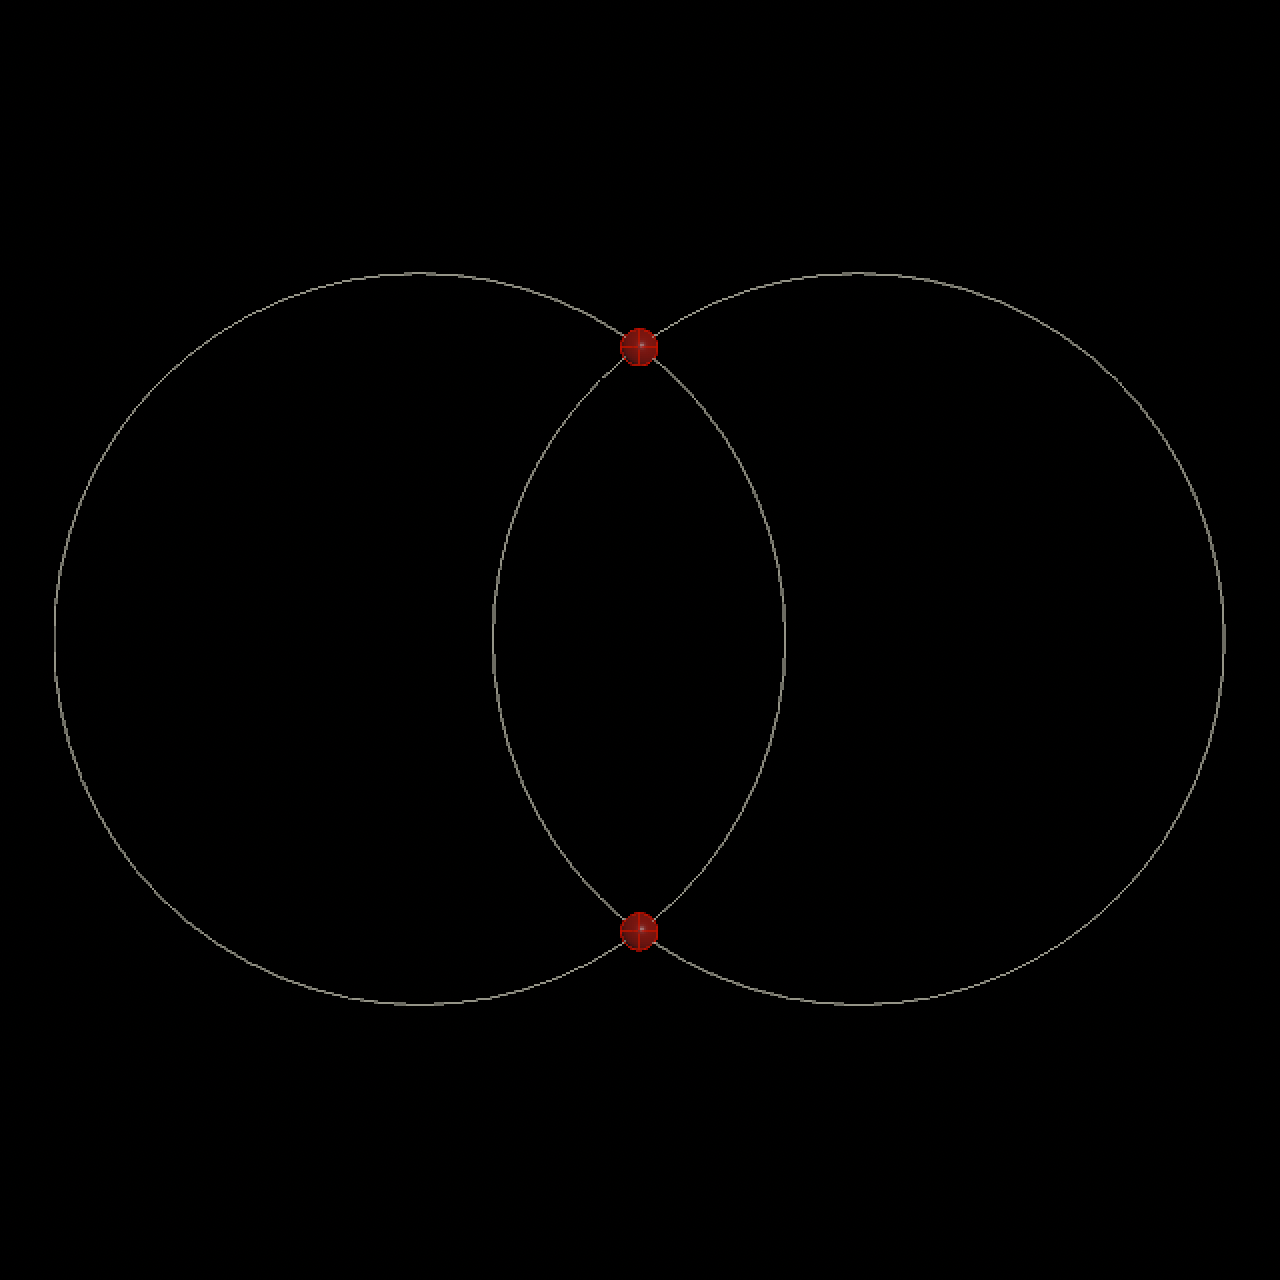
I used only circles (also copied by a circle), but any curve/polyline can be used.
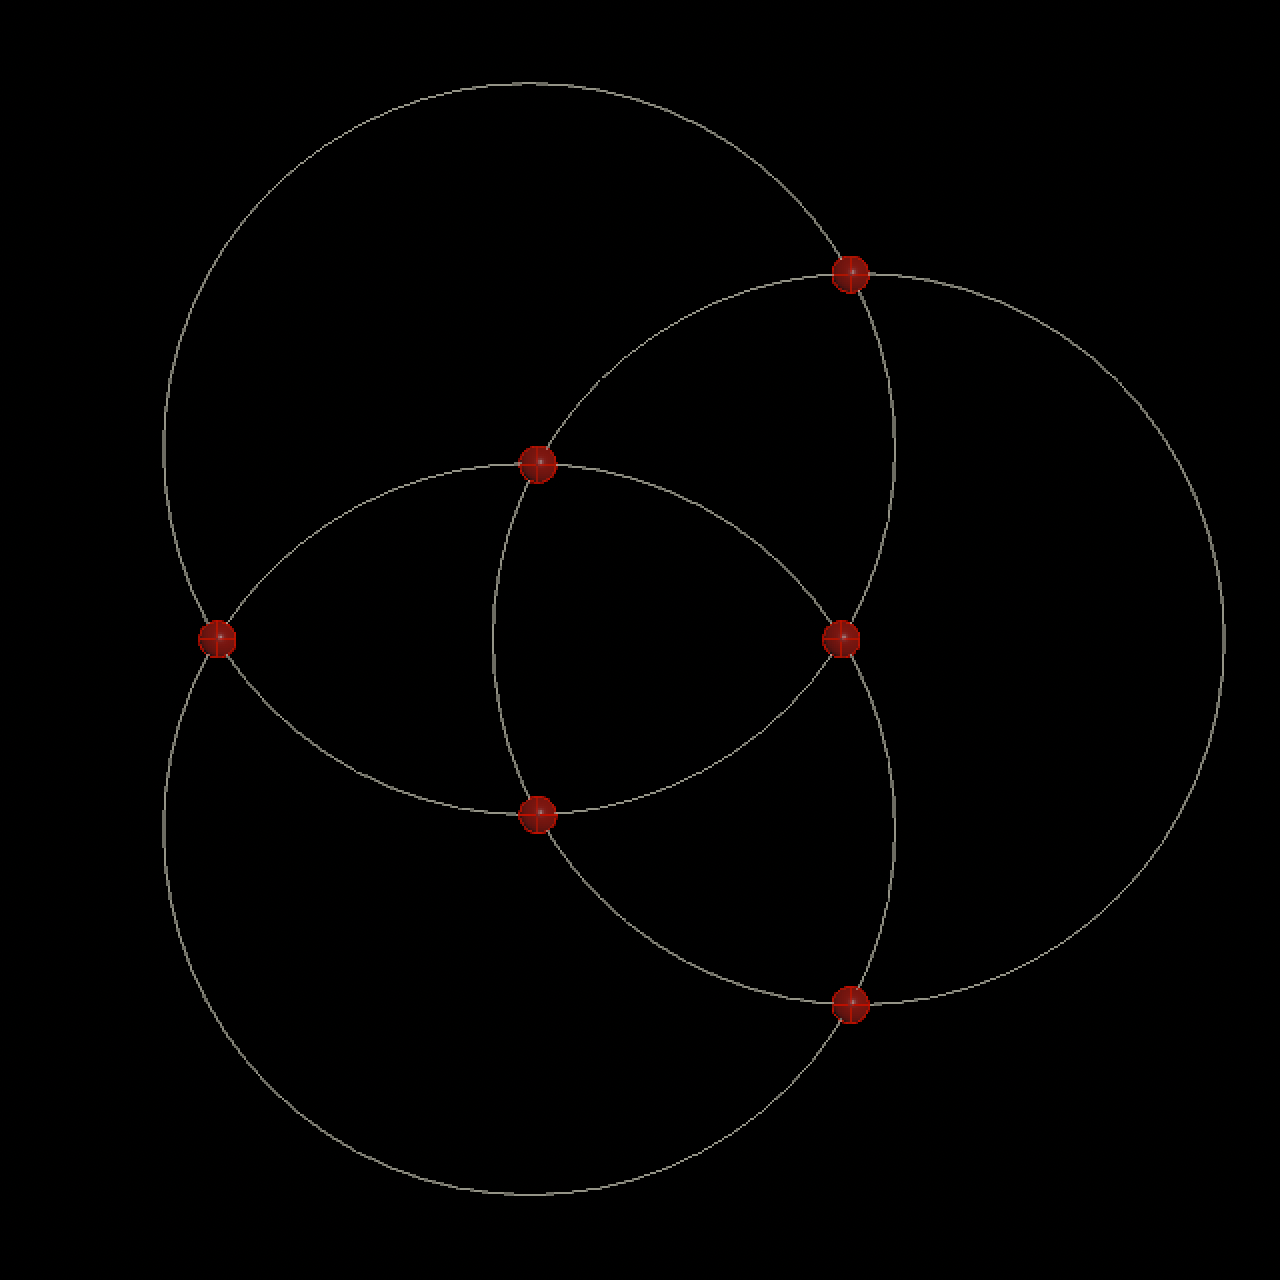
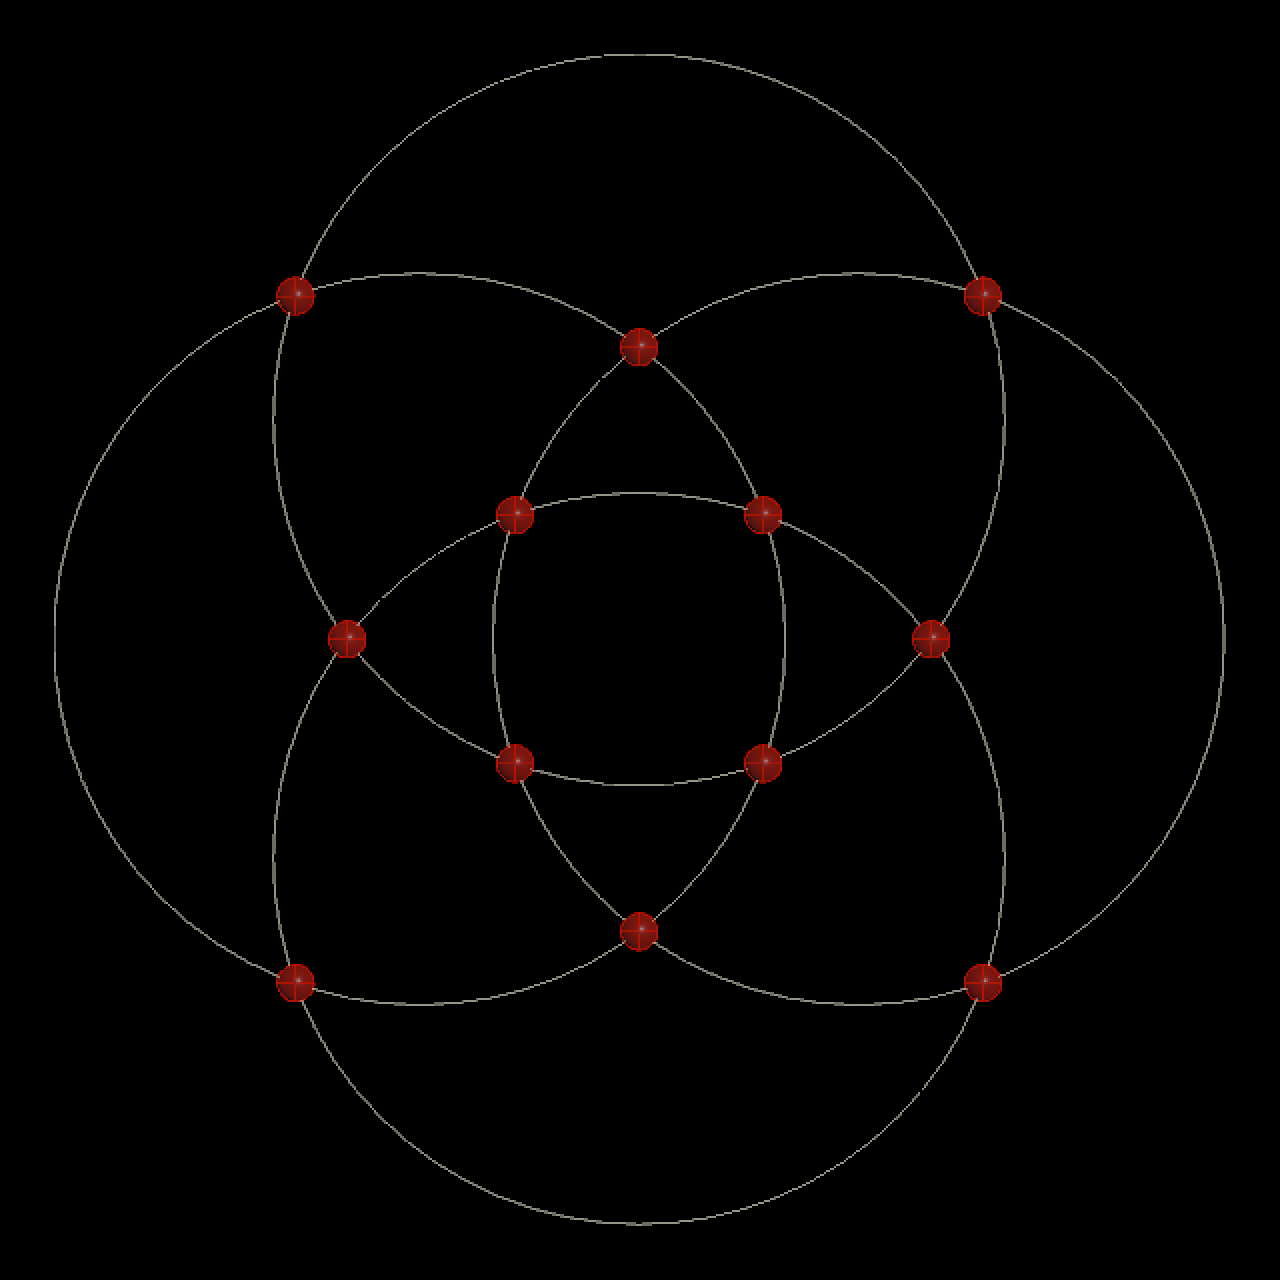
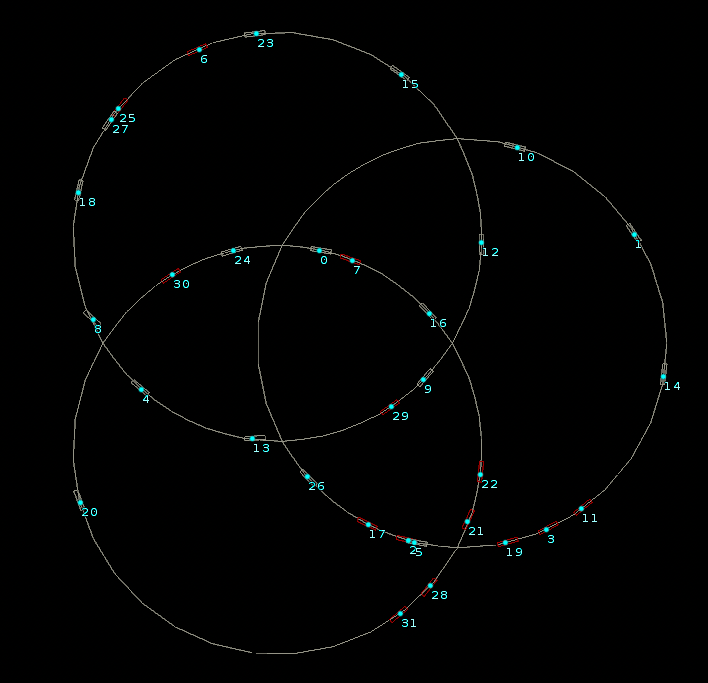
Number Each Roads / Intersection

By splitting curves at intersection, add ID for each street and intersection.


Point vectors for normal and tangent should be set properly.
It tends to break around intersections, so fix them by transferring original vectors.
Attribute Transfer SOP, Orient Along Curve SOP will help.
Positioning Cars
Scatter points randomly as a starting point.
Keep uv corrdinate on curves at first, and increment uv position every frame inside Solver.
Note that perimeter of each curve should be applied as a scale for the increment value (=speed).
I decided to control by their accelaration to give a feel of inertia.
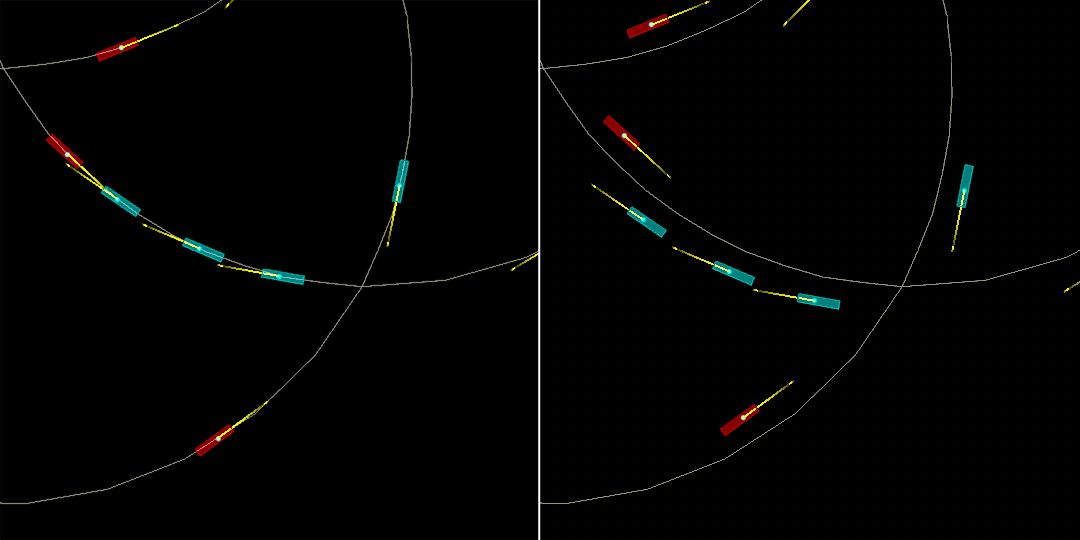
Offset cars from curve based on heading direction, inwards or outwards. Use N vector from the curve.
*Note that cars kept left in Japan
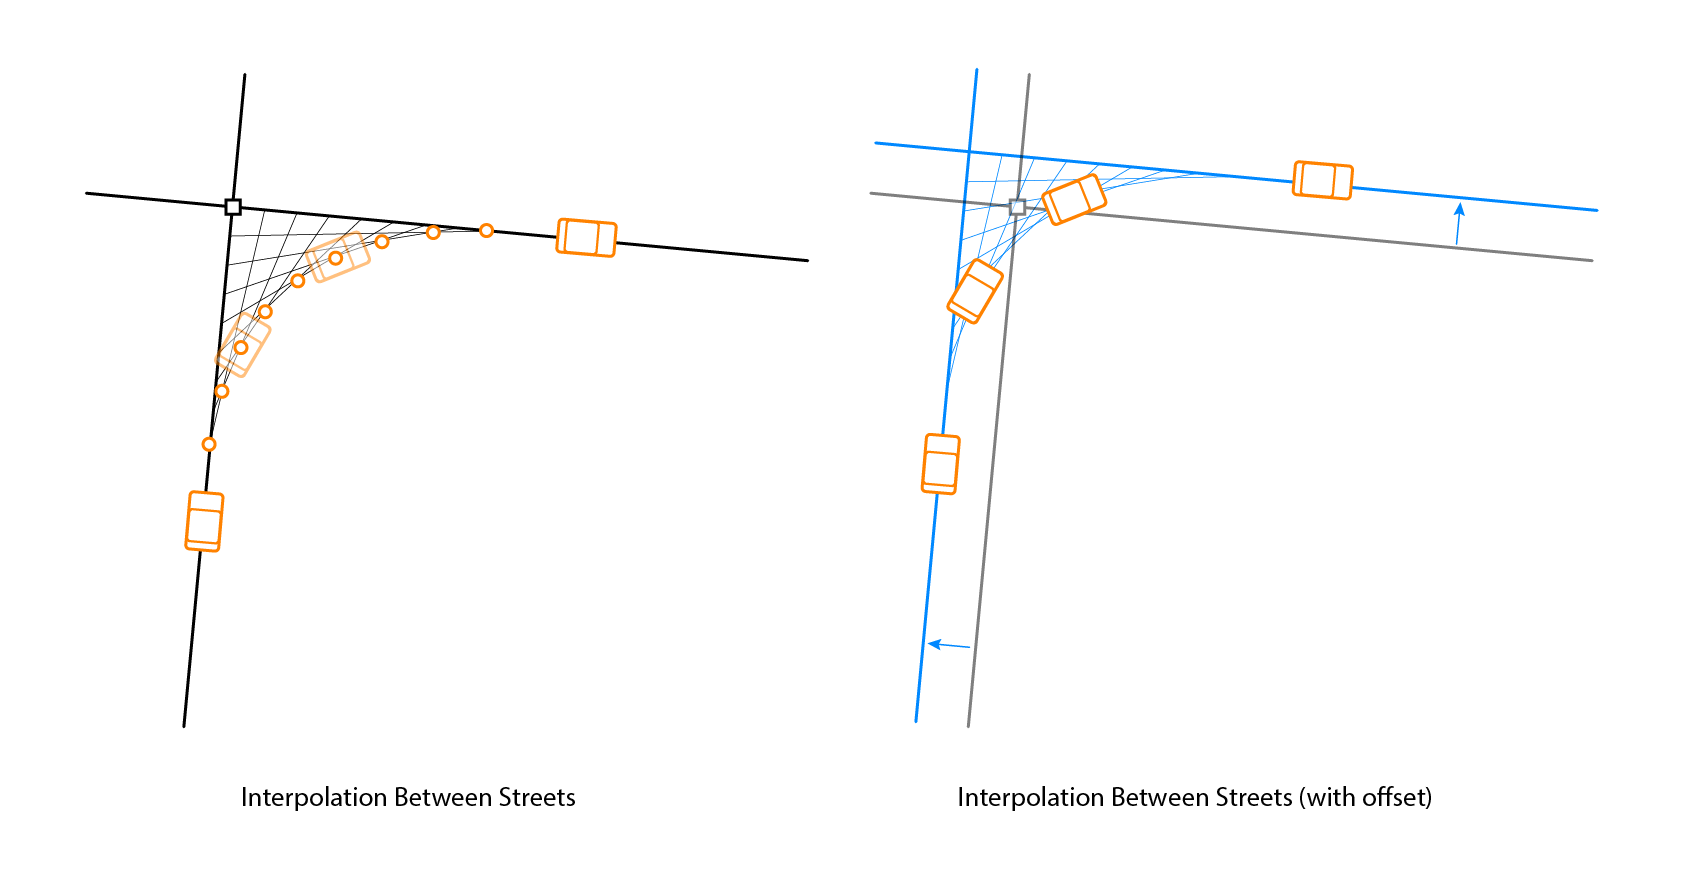
Around intersections, position and normal vector is iterpolated between two streets.
I used a way similar to quadratic bezier curve. It should be applied after the offset above.
Simulating Cars behavior
Inside solver, check 2 conditions below on each frame.
Condition #1: Check forward (per Car)
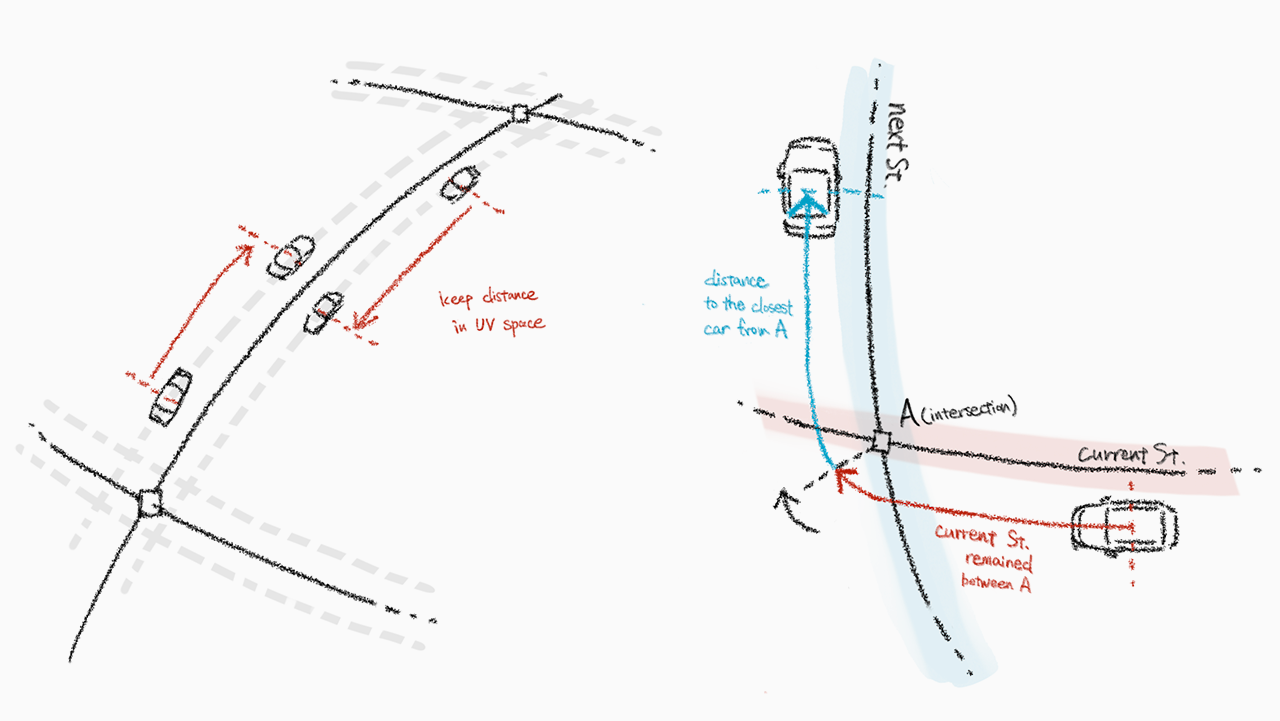
For each car, check the closest car ahead. If distance is too close, decrease speed.
Checking not just cars in same street, but also the ones after the corner will be necesarry in most cases.
Condition #2: Priotize the closest (per Intersection)
For each intersection, check the distance to all the cars which is heading toward it.
Except the closest car, decrease the speed.
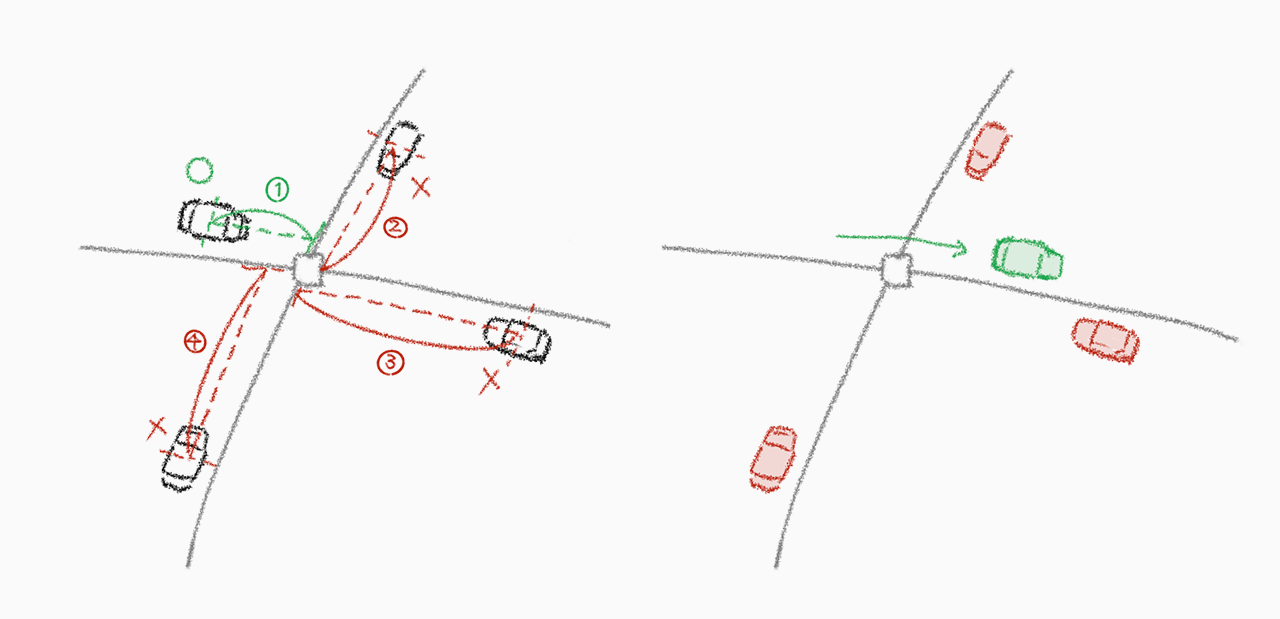
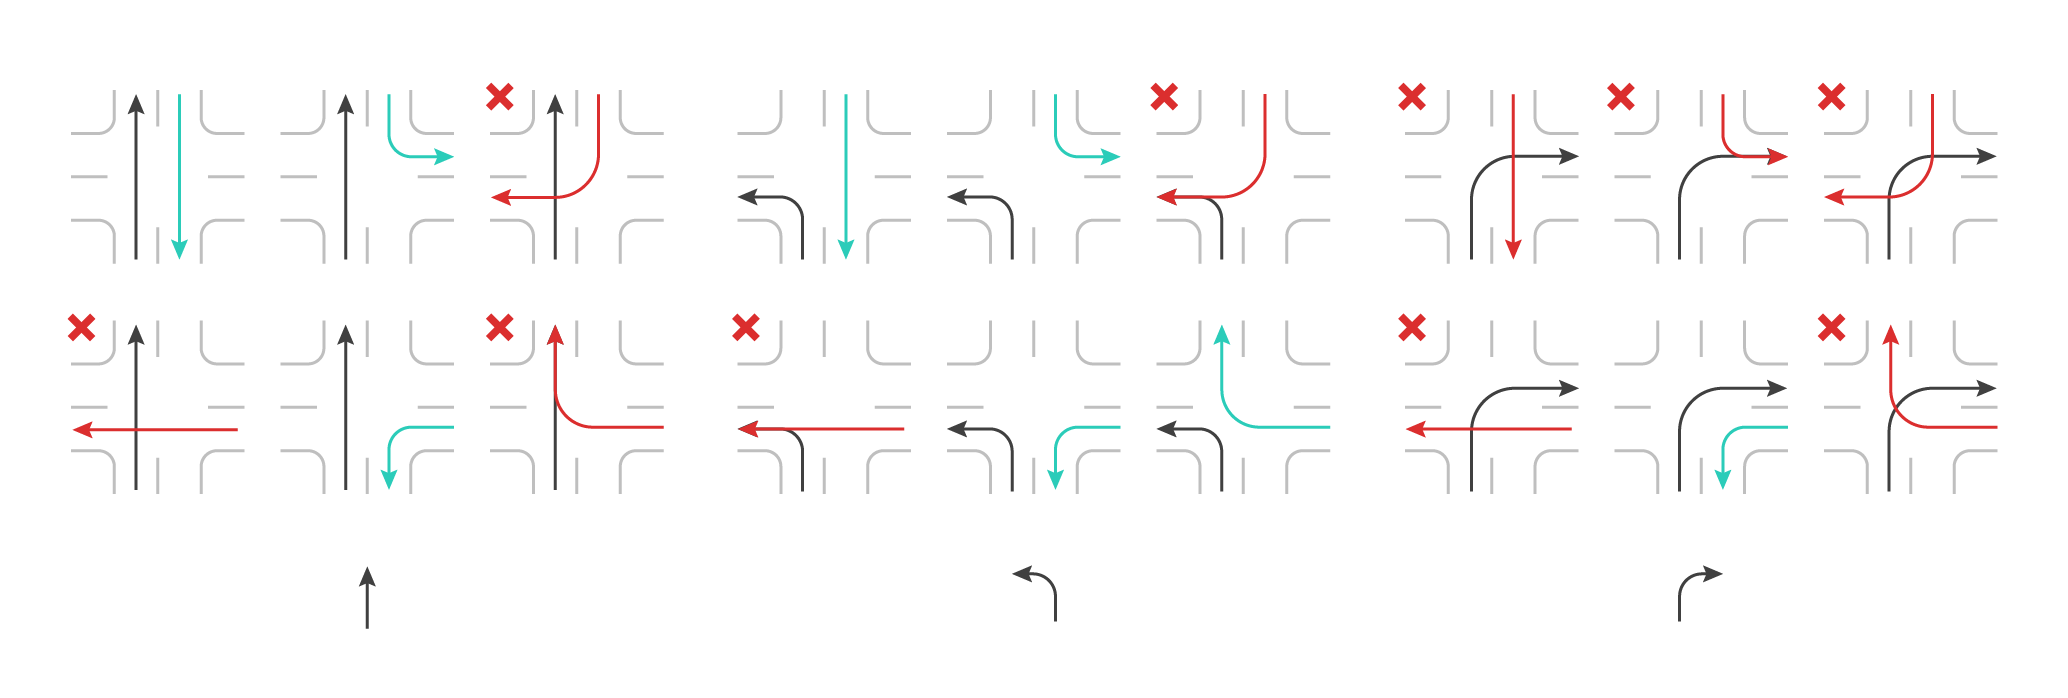
Cars would flow more smoothly by implementing below, which allows passing-by when possible.
To implement this, next turning direction should be decided right after entering the street.
*patterns coming from the left street is not included, but I think this covers all the combination to be considered.
After everything added up, process inside solver looked like this. (All Wrangle SOP)

And this concludes as the movement below.
Optional: Generating Street Geo

Geometry for the streets were also generated directly from the curve.
For center lines, carved each polyline's end at constant distance by scaling U value by their perimeter.
For outer lines, Poly Expand 2D SOP was helpful. Used Smooth SOP to smooth out around intersections.
Optional: Light Instancing (Redshift)
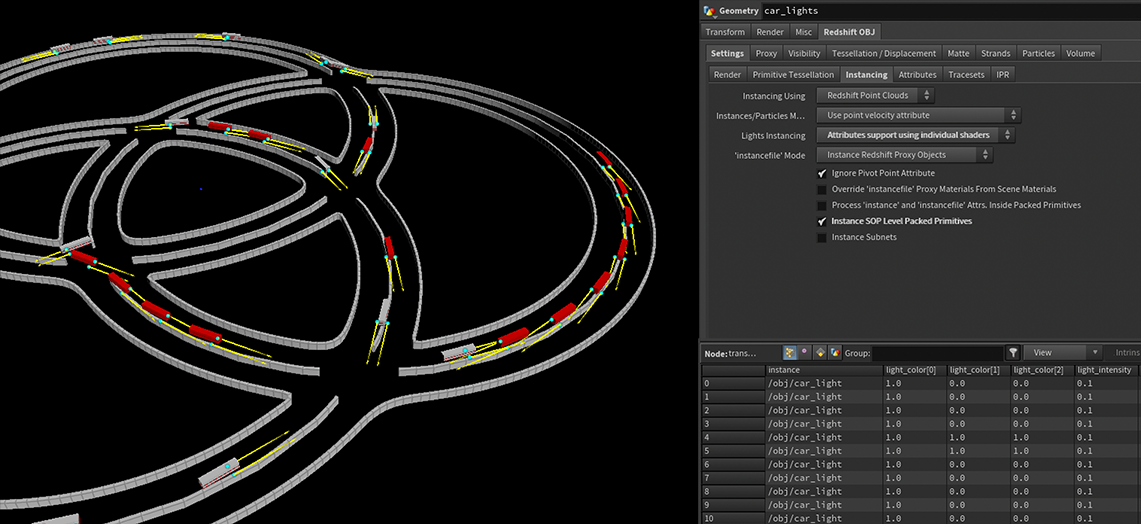
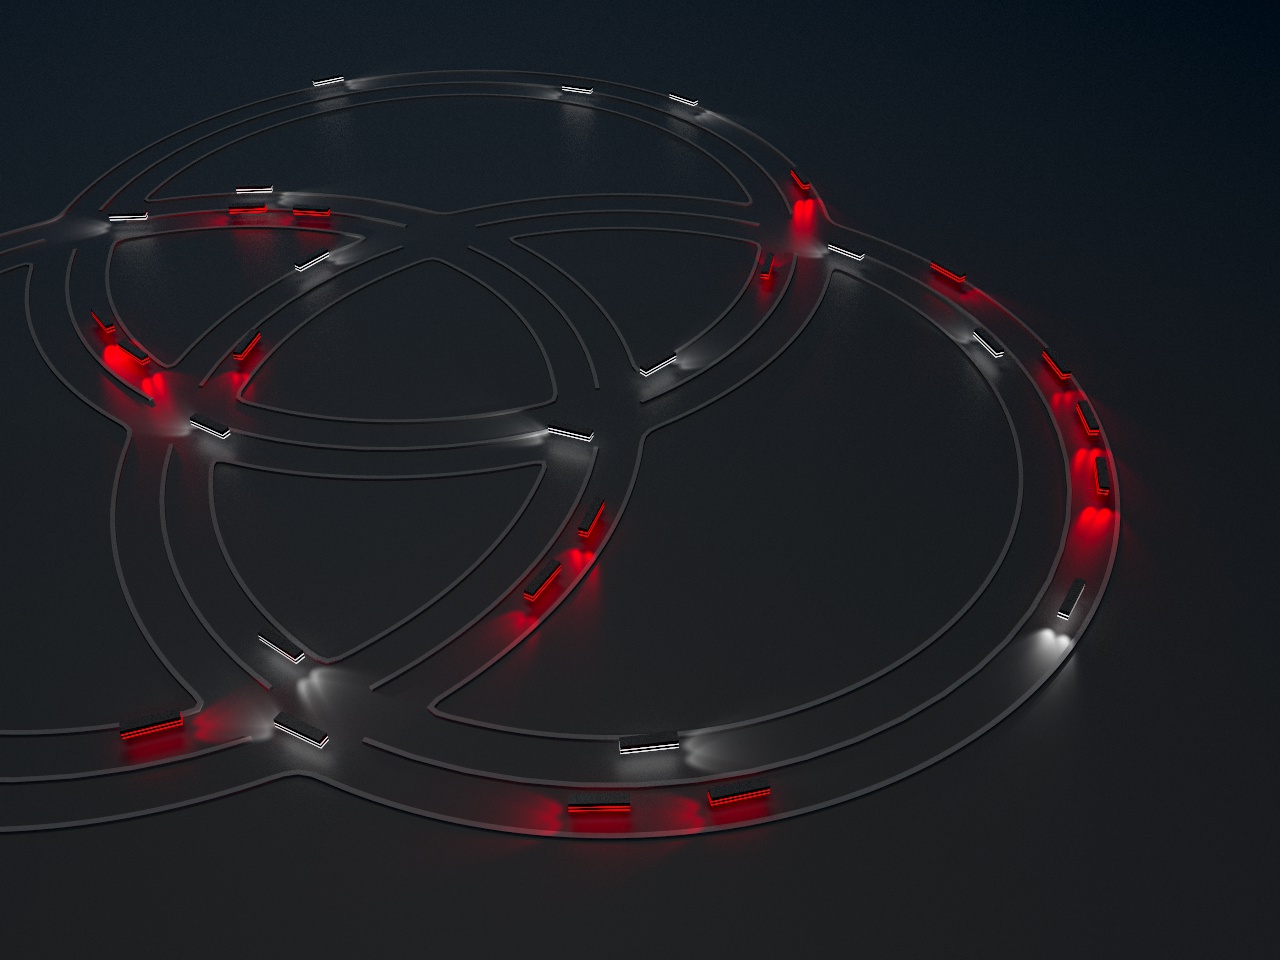
Headlights are made by light instancing in Redshift.
You can control light color and intensity individually by setting up some point attributes.
(s@instance, v@light_color, f@light_intensity, and @N for direction)
It was straight forward, and also didn't have much impact in render than I expected. Maybe adding some fog made it looked nicer.
Further Thoughts
I found it interesting observing intersections.
Though they are just controlled globally (in condition #2), they looks as if they're carefully considering, and holding back each other.
On the other hand, they pass by without even slowing down, as if they know exactly which way the other is going. (because they know)
Oneday I would like to make something more wide and long, so I can observe them for a while.